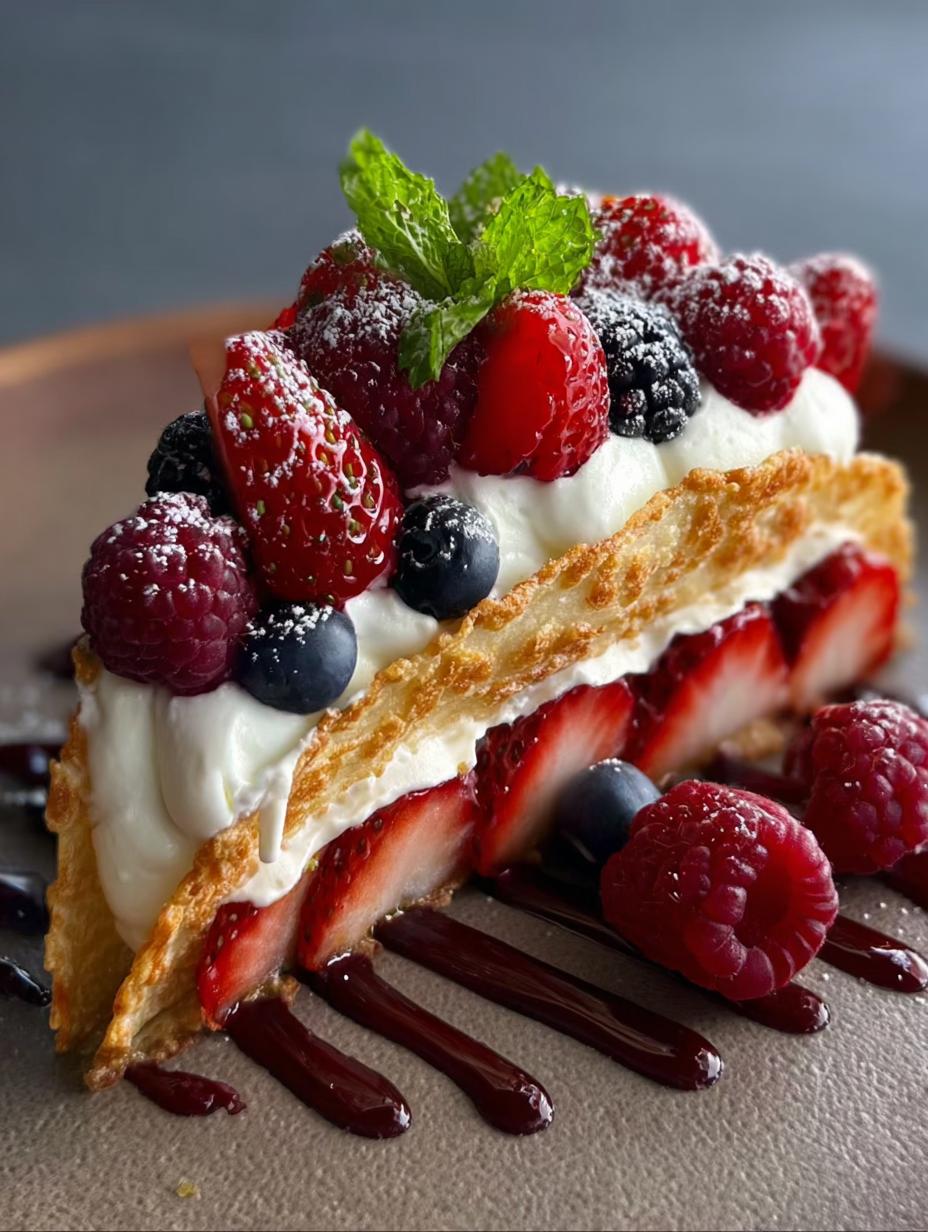
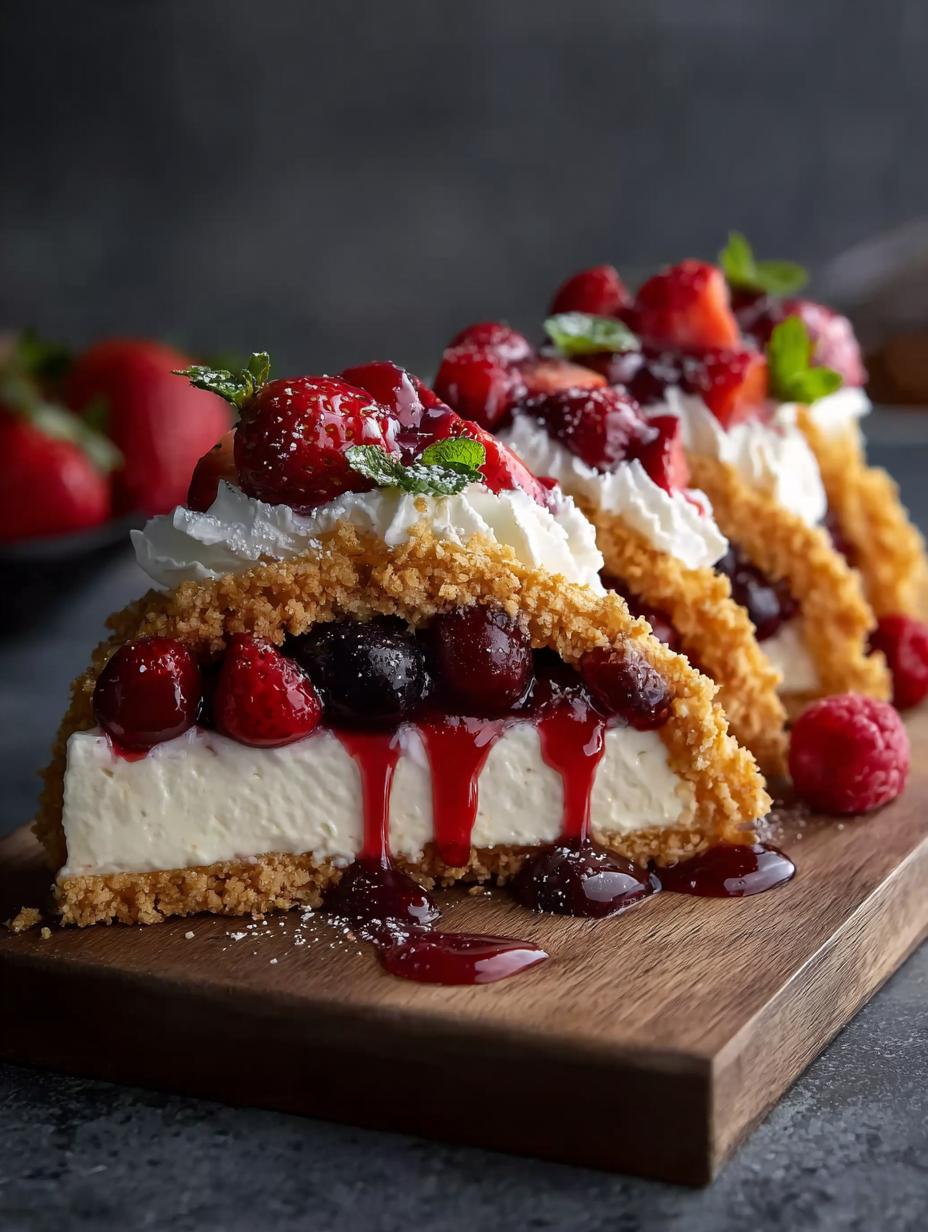
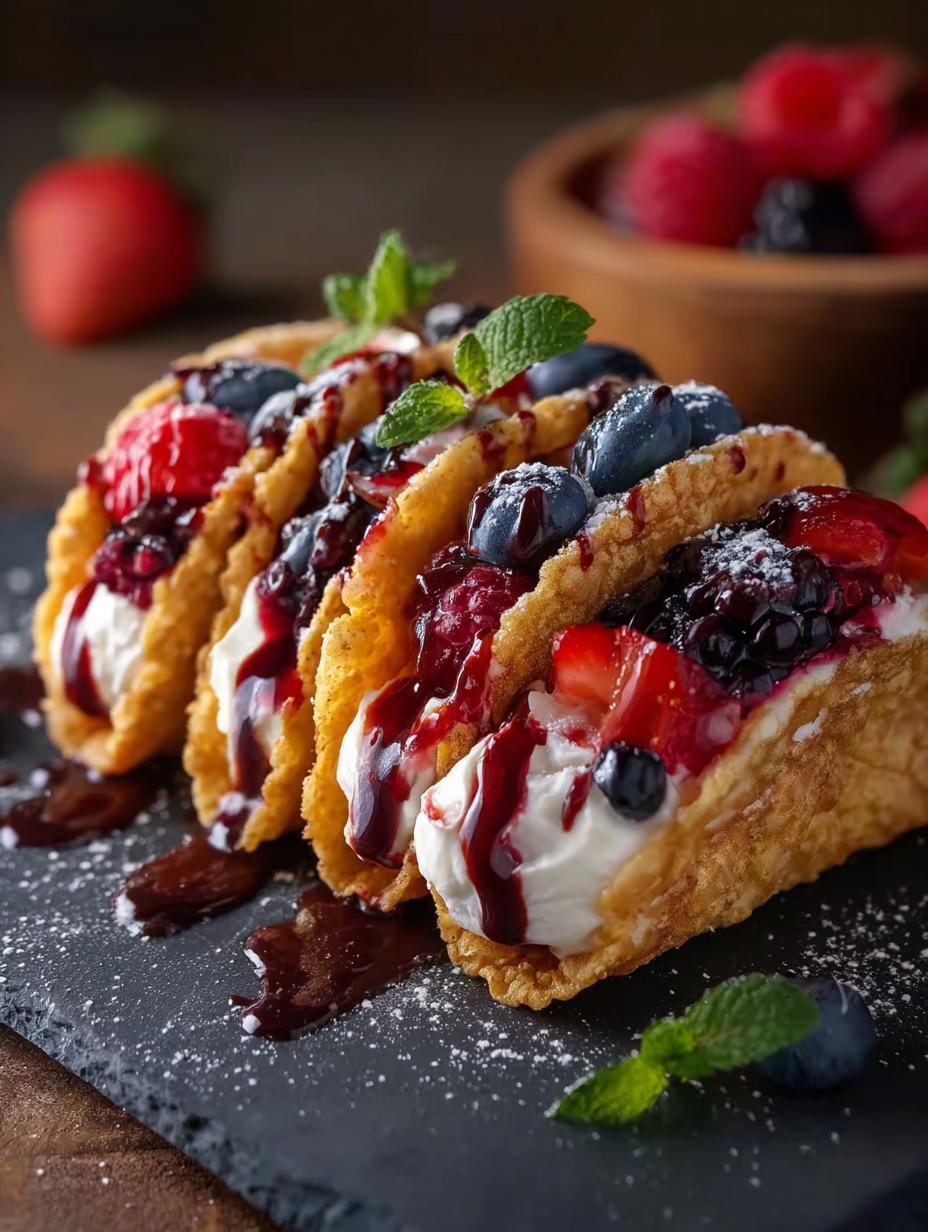
Berrylicious Cheesecake Tacos have completely transformed my dessert game! I remember the first time I saw these little beauties; they looked like something out of a gourmet magazine, but I was surprised to learn just how easy they are to whip up. The idea of a crispy, cinnamon-sugar shell holding a cool, creamy cheesecake filling, all topped with fresh, juicy berries, was simply irresistible. The crunch of the shell, the smooth tang of the cream cheese, and the burst of sweet berries create a symphony of textures and flavors that’s honestly addictive. If you’re looking for a show-stopping yet simple dessert, this berry cheesecake tacos recipe is your answer. Let’s get cooking!
Why You’ll Love These Berrylicious Cheesecake Tacos
Get ready to fall in love with these delightful dessert tacos! They’re more than just a treat; they’re an experience.
- Impressive Presentation: They look incredibly fancy, but are surprisingly simple to make.
- Perfect Texture Combo: You get a satisfying crunch from the shells and a silky smooth creaminess from the filling.
- Flavor Explosion: The sweet berries perfectly balance the tangy cream cheese for a delightful taste.
- Easy Berrylicious Cheesecake Tacos: Seriously, the steps are straightforward, making this a stress-free dessert.
- Customizable Fun: Feel free to swap out berries or add other toppings to make them your own.
- Sweet Dessert Tacos with Cream Cheese: This combination is a classic for a reason – pure deliciousness!
- Minimal Effort, Maximum Reward: They come together quickly, leaving you more time to enjoy the party.
- A Crowd-Pleaser: Kids and adults alike adore these unique and tasty treats.
Ingredients for Berrylicious Cheesecake Tacos
Gathering these simple ingredients is the first step to creating your amazing Berrylicious Cheesecake Tacos. The magic happens when these components come together, especially the components for the cheesecake filling taco shells.
- 10 small flour tortillas – for forming the crispy taco shells
- 1 cup granulated sugar – for sweetening the shells and the filling
- 2 teaspoons cinnamon – to spice up the taco shells
- 4 tablespoons butter, melted – to help the shells crisp up and adhere the sugar
- 1 package (8 oz) cream cheese, softened – the creamy base for our delicious no-bake filling
- 1 cup heavy whipping cream – whipped to fluffy perfection for lightness
- 1 cup powdered sugar – to sweeten and thicken the cheesecake filling
- 1 teaspoon vanilla extract – for that classic, comforting cheesecake flavor
- 1/2 cup strawberries, diced – for a burst of sweet, tangy berry flavor
- 1/2 cup blueberries – adds a lovely pop of color and taste
- 1/2 cup raspberries – their tartness complements the sweet cream cheese
How to Make Homemade Berrylicious Cheesecake Tacos
Ready to create these delightful dessert tacos? Follow these simple steps for a truly homemade treat. This recipe for how to make Berrylicious Cheesecake Tacos is designed to be easy and fun!
Making the Crispy Taco Shells
- Step 1: Preheat your oven to 400°F (200°C). This high heat is key for getting those shells perfectly crisp.
- Step 2: Prepare your tortillas. You can use a round cookie cutter or the rim of a glass to cut small circles from the flour tortillas. This ensures uniform shapes for beautiful presentation, which is a hallmark of great dessert taco recipes with berries.
- Step 3: Melt the butter and brush it evenly on both sides of each tortilla round. In a shallow dish, mix the granulated sugar and cinnamon.
- Step 4: Press each buttered tortilla round into the cinnamon-sugar mixture, making sure both sides are well coated. The aroma of cinnamon sugar is already amazing!
- Step 5: Drape each coated tortilla circle over two oven rack bars, shaping them into a gentle taco shell. Bake for 5–7 minutes, or until they are golden brown and wonderfully crisp. Keep a close eye on them as they can brown quickly.
- Step 6: Carefully remove the shells from the oven and let them cool completely on a wire rack. They need to be fully cooled and firm before filling.

Crafting the Creamy No-Bake Cheesecake Filling
- Step 7: In a medium bowl, beat the softened cream cheese until it’s completely smooth and free of lumps. This creates the foundation for the best berry cheesecake taco filling.
- Step 8: Add the powdered sugar and vanilla extract to the cream cheese. Beat again until everything is well combined and creamy.
- Step 9: In a separate, clean bowl, whip the heavy whipping cream until stiff peaks form. This adds an airy lightness to the filling.
- Step 10: Gently fold the whipped cream into the cream cheese mixture. Be careful not to overmix; you want to maintain that fluffy texture.
- Step 11: Chill the cheesecake filling in the refrigerator for at least 30 minutes. This helps it firm up, making it easier to handle when assembling.
Assembling Your Sweet Dessert Tacos
- Step 12: Once the taco shells are completely cool and the filling is chilled, it’s time to assemble. Spoon or pipe the creamy cheesecake mixture into each crisp taco shell.
- Step 13: Top generously with your fresh, diced strawberries, blueberries, and raspberries. This is how to assemble cheesecake tacos that look as good as they taste!
- Step 14: For the best texture, serve these Berrylicious Cheesecake Tacos immediately. The shells are at their crispiest right after assembly, offering a delightful contrast to the smooth filling.

Pro Tips for the Best Berrylicious Cheesecake Tacos
Want to make your Berrylicious Cheesecake Tacos absolutely unforgettable? I’ve picked up a few tricks that make all the difference. These tips will ensure your dessert tacos are a hit every single time.
- Always use fresh, high-quality berries. They provide the best flavor and vibrant color.
- Don’t overbake the taco shells; they should be crisp but not burnt.
- Ensure your cream cheese is truly softened for a super smooth filling.
- Chill the filling properly; this makes assembly much cleaner and easier.
What’s the secret to perfect Berrylicious Cheesecake Tacos?
The secret lies in the contrast: a perfectly crisp, cinnamon-sugar shell paired with a luxuriously smooth, chilled no-bake filling. This balance is key to amazing berry flavored cheesecake tacos. For more on the science of food textures, you can explore resources on food texture.
Can I make Berrylicious Cheesecake Tacos ahead of time?
Yes, but with a caveat! Store the cooled taco shells and the chilled filling separately. Assemble just before serving to maintain the shells’ crispness, which is one of my favorite creative dessert taco variations.
How do I avoid common mistakes with these dessert tacos?
Avoid overmixing the cheesecake filling – it can make it too dense. Also, be sure the shells are completely cool before filling; warm shells will melt the cream cheese. These simple steps ensure perfect sweet dessert tacos with cream cheese. For more tips on baking and dessert making, check out our baking tips.
Best Ways to Serve Berrylicious Cheesecake Tacos
These delightful Berrylicious Cheesecake Tacos are a treat on their own, but serving them thoughtfully can elevate the experience even further. They’re perfect for a light dessert after a meal or as a star attraction at any gathering. Here are a few ideas to make your dessert spread even more special.
- Serve them immediately after assembly for the ultimate crisp shell and creamy filling contrast.
- Pair them with a light, refreshing beverage like sparkling water with a twist of lime or a delicate herbal tea.
- Consider offering a small side of fresh mint or a drizzle of raspberry coulis for extra flair. These fruity cheesecake taco ideas add a touch of elegance.
- Arrange them on a decorative platter for a stunning presentation that guests will adore.
Nutrition Facts for Berrylicious Cheesecake Tacos
When enjoying these delightful Berrylicious Cheesecake Tacos, it’s helpful to have an idea of the nutritional breakdown per serving. The combination of crispy shells, creamy filling, and fresh berries creates a balanced dessert treat.
- Serving Size: 1 taco
- Calories: 280
- Fat: 17g
- Saturated Fat: 10g
- Protein: 3g
- Carbohydrates: 28g
- Fiber: 1g
- Sugar: 18g
- Sodium: 150mg
Nutritional values are estimates and may vary based on specific ingredients used, especially the type of tortillas and exact berry amounts. For more information on nutritional guidelines, you can refer to the privacy policy which often contains related information.
How to Store and Reheat Berrylicious Cheesecake Tacos
Even though these homemade Berrylicious Cheesecake Tacos are best enjoyed fresh, I’ve found a few ways to keep them delicious if you have leftovers or want to prep ahead. Proper storage is key to preserving that delightful crunch and creamy texture. Don’t worry if you can’t finish them all in one go!
- Cool Completely: Before storing, ensure the taco shells are fully cooled and the cheesecake filling is chilled. This prevents sogginess and condensation.
- Store Separately: For the absolute best results, store the crisp taco shells and the cheesecake filling in airtight containers separately in the refrigerator. This keeps the shells from getting stale or soft.
- Refrigerator Storage: Stored separately, the shells can last for about 3-4 days. The filling will also keep well in the fridge for the same amount of time.
- Freezer Option: If you want to store them for longer, you can freeze the cooled taco shells and the chilled filling separately for up to 3 months. Wrap them well in plastic wrap and then in foil or place them in freezer-safe containers.
- Reheating (or rather, refreshing): To serve, assemble the tacos right before eating. If your shells were frozen, let them thaw at room temperature for about 30 minutes before filling. You can also gently refresh slightly softened shells by placing them in a low oven (around 250°F or 120°C) for a few minutes until crisp again.
Frequently Asked Questions About Berrylicious Cheesecake Tacos
What are Berrylicious Cheesecake Tacos?
Berrylicious Cheesecake Tacos are a fun and creative dessert that takes the best elements of a classic cheesecake and combines them with the delightful crunch of a taco shell. We’re talking a crispy, cinnamon-sugar coated shell filled with a smooth, creamy no-bake cheesecake filling and topped with a medley of fresh, vibrant berries. They’re a playful twist on traditional desserts! For more on dessert trends, you can check out our homepage.
Why are Berrylicious Cheesecake Tacos popular?
These dessert tacos are incredibly popular because they offer a fantastic combination of textures and flavors that everyone loves. The satisfying crunch of the shell, the cool creaminess of the filling, and the burst of fresh berries create a truly memorable bite. Plus, they’re visually stunning and relatively easy to assemble, making them perfect for parties and special occasions where you want to impress without a lot of fuss.
Can I use store-bought taco shells?
While I highly recommend making your own cinnamon-sugar shells for the best flavor and texture, you could technically use store-bought dessert shells if you’re in a pinch. However, they won’t have that delightful homemade crunch or the sweet cinnamon-sugar coating that really makes these Berrylicious Cheesecake Tacos special. The homemade shells are a game-changer! If you’re interested in learning more about our site’s policies, please see our terms of use.
What kind of berries work best for these dessert tacos?
A mix of fresh berries is usually best for these sweet dessert tacos with cream cheese! Strawberries, blueberries, and raspberries are my go-to because they offer a lovely balance of sweetness and tartness. You can also add blackberries or even some diced kiwi for extra color and flavor. Just make sure they are fresh and ripe for the best taste.
Variations of Berrylicious Cheesecake Tacos You Can Try
While the classic Berrylicious Cheesecake Tacos are a dream, don’t be afraid to explore and create your own unique twists! These variations can help you tailor them to different tastes, dietary needs, or even just for fun. Get ready to discover some truly gourmet berry cheesecake tacos.
- Gluten-Free Delight: Swap the flour tortillas for gluten-free tortillas or even large lettuce leaves for a lighter, gluten-free option. You can also make a graham cracker crust base, similar to a traditional cheesecake, and press it into mini muffin tins to form little cups.
- Chocolate Lover’s Dream: Drizzle the finished tacos with melted dark or milk chocolate. You could also add a tablespoon of cocoa powder to the cheesecake filling for a chocolatey twist, making these even more decadent.
- Tropical Escape: Instead of mixed berries, try a tropical fruit medley! Diced mango, pineapple, and a sprinkle of shredded coconut can transport your taste buds to paradise. This is one of my favorite fruity cheesecake taco ideas.
- Spice It Up: Add a pinch of cinnamon or even a tiny bit of cayenne pepper to the cheesecake filling for a subtle kick that complements the sweet berries. These variations are perfect for making your own fun dessert taco recipes for parties.

Berrylicious Cheesecake Tacos: Irresistible 1-Minute Treat
- Total Time: 30 minutes plus chilling
- Yield: 10 mini cheesecake tacos 1x
- Diet: Vegetarian
Description
Berrylicious Cheesecake Tacos are a playful and elegant dessert combining crispy cinnamon-sugar taco shells with a creamy no-bake cheesecake filling and topped with fresh, vibrant berries. They offer a delightful crunch, creamy texture, and a balance of sweet and tangy flavors, perfect for any occasion.
Ingredients
- For the Taco Shells:
- 10 small flour tortillas
- 1 cup granulated sugar
- 2 teaspoons cinnamon
- 4 tablespoons butter, melted
- For the Cheesecake Filling:
- 1 package (8 oz) cream cheese, softened
- 1 cup heavy whipping cream
- 1 cup powdered sugar
- 1 teaspoon vanilla extract
- For the Toppings:
- 1/2 cup strawberries, diced
- 1/2 cup blueberries
- 1/2 cup raspberries
Instructions
- Prepare the Taco Shells: Preheat your oven to 400°F (200°C). Cut small circles from the flour tortillas using a round cookie cutter or glass rim. Melt butter and brush it on both sides of each tortilla round. Mix sugar and cinnamon in a shallow dish. Press each tortilla round into the cinnamon sugar, coating both sides. Drape each tortilla circle over two oven rack bars to form a taco shell shape. Bake for 5–7 minutes until golden and crisp. Let them cool completely on a wire rack.
- Make the Cheesecake Filling: Beat softened cream cheese until smooth. Add powdered sugar and vanilla extract; beat until combined. In a separate bowl, whip heavy cream until stiff peaks form. Gently fold the whipped cream into the cream cheese mixture until fluffy. Chill the filling for at least 30 minutes.
- Assemble the Cheesecake Tacos: Spoon or pipe the chilled cheesecake mixture into the cooled taco shells. Top generously with fresh berries.
- Serve and Enjoy: Serve immediately for the best texture. For optimal crispness, consume within 1-2 hours of assembly.
Notes
- For added crunch, sprinkle crushed graham crackers or granola on top.
- Drizzle with chocolate or berry sauce for an enhanced flavor.
- If making ahead, store shells and filling separately and assemble just before serving.
- These are best enjoyed fresh while the shells remain crisp.
- Prep Time: 20 minutes
- Cook Time: 7 minutes
- Category: Dessert
- Method: Baked shells, no-bake filling
- Cuisine: American
Nutrition
- Serving Size: 1 taco
- Calories: 280
- Sugar: 18g
- Fat: 17g
- Carbohydrates: 28g
- Protein: 3g
Keywords: Berrylicious Cheesecake Tacos, cheesecake tacos, berry dessert tacos, no-bake cheesecake, dessert tacos, cream cheese tacos, sweet tacos, fruity tacos, homemade cheesecake tacos, easy dessert tacos, party desserts, berry recipes
