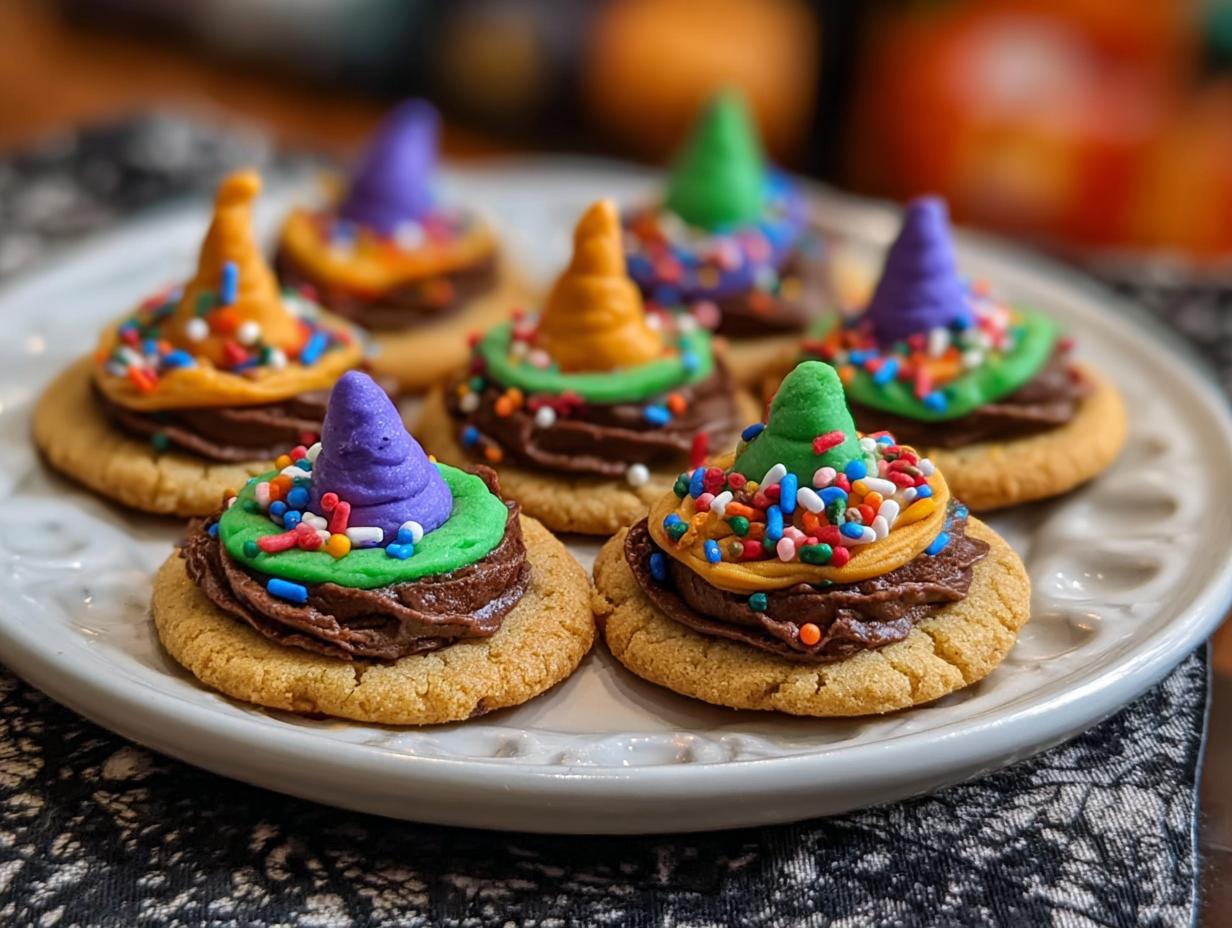
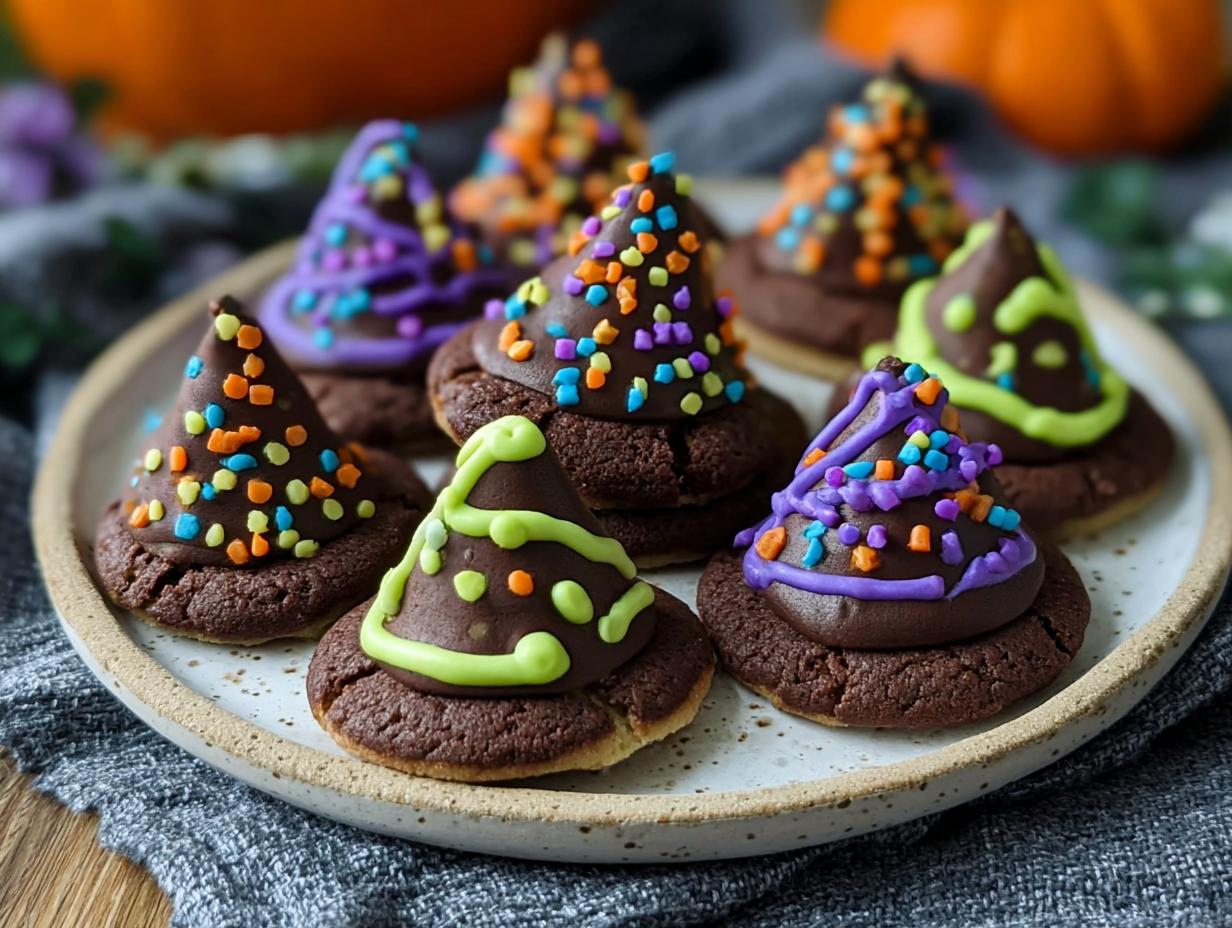
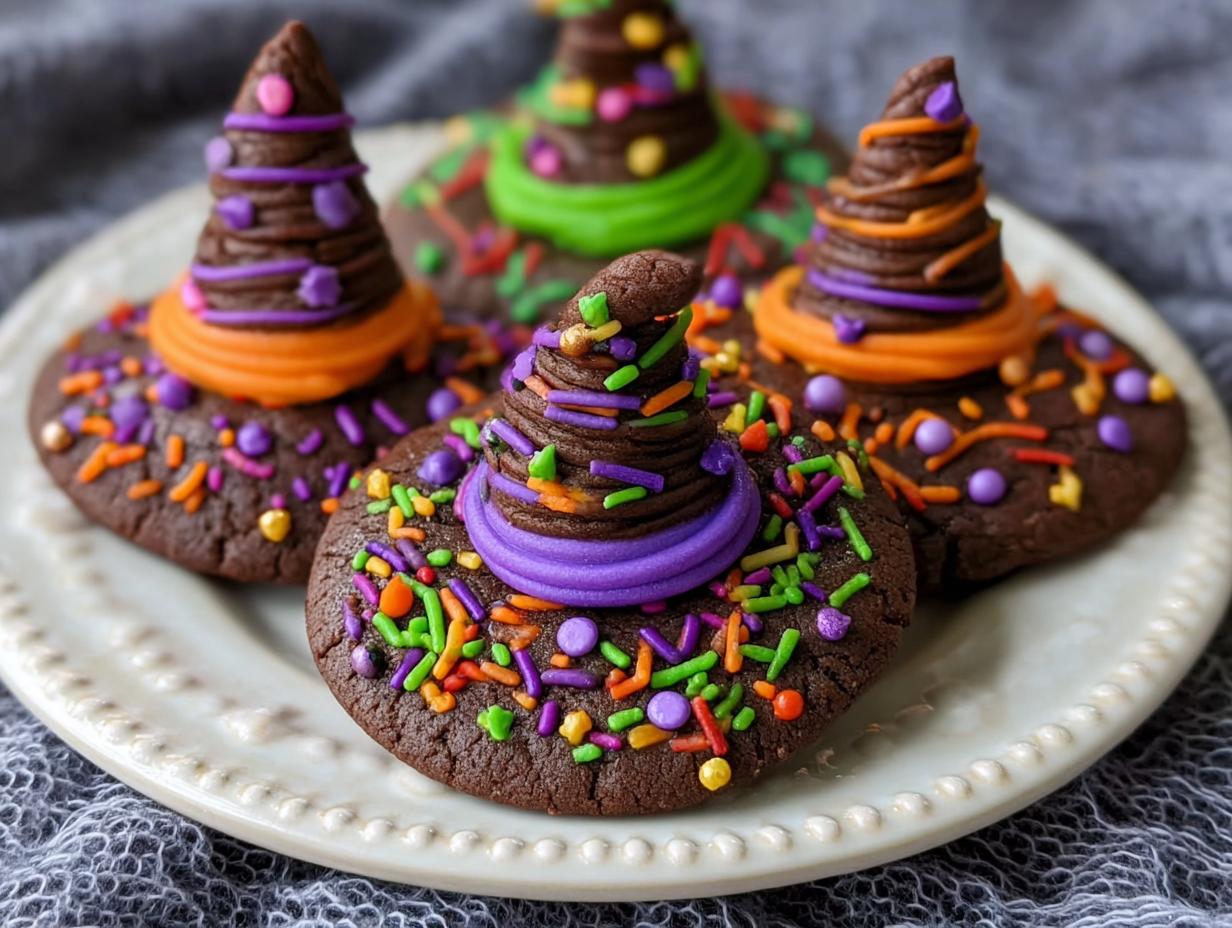
Irresistible Witch Hat Cookies have a way of transporting me straight back to childhood Halloweens! I remember the first time I saw these iconic treats – they looked like they were plucked right from a storybook, with their pointed hats and colorful decorations. The smell of warm sugar and melting chocolate filled the air, and I just knew I had to try making them myself. These aren’t just any cookies; they’re truly bewitching witch hat cookies that bring a touch of magic to any celebration. If you’re looking for an easy witch hat cookies recipe that will wow everyone, you’ve found it. Let’s get magical with these cookies!
Why You’ll Love These Irresistible Witch Hat Cookies
- The taste is pure, sweet delight with a satisfying cookie crunch.
- They’re surprisingly quick to make, perfect for busy evenings.
- The recipe uses simple, accessible ingredients, making them budget-friendly.
- Kids absolutely adore helping to decorate these festive treats.
- These Halloween Witch Hat Cookies are a guaranteed hit at any spooky gathering.
- They add a whimsical, homemade touch to your dessert table.
- You’ll find them to be wonderfully versatile for creative decorating.
- These Halloween Witch Hat Cookies are sure to be a crowd-pleaser.
Ingredients for Magical Witch Hat Cookies
Gathering the right components is key to creating these delightful treats. You’ll need a good base for your cookies, which is where quality sugar cookie dough comes in. For the dipping and decorating, we’ll use smooth melting chocolate and a colorful assortment of sprinkles and candies to bring your Irresistible Witch Hat Cookies to life. These are truly the best ingredients for Witch Hat Cookies to ensure a delicious and visually appealing outcome.
- 3 cups all-purpose flour – the structure of our cookies
- 1 cup (2 sticks) unsalted butter, softened – for richness and texture
- 1 ½ cups granulated sugar – to sweeten and help with browning
- 2 large eggs – bind everything together
- 1 teaspoon vanilla extract – for that classic sweet flavor
- ½ teaspoon baking powder – just a touch for lift
- ¼ teaspoon salt – balances the sweetness
- 12 oz chocolate chips or melting wafers (milk, dark, or white) – for dipping
- Assorted sprinkles and small candies – for decorating
How to Make Easy Witch Hat Cookies
Let’s get baking these fantastic homemade Witch Hat Cookies! The process is quite fun and not at all complicated, perfect for a festive afternoon.
- Step 1: Preheat your oven to 350°F (175°C). Line two baking sheets with parchment paper. This prevents sticking and makes cleanup a breeze.
- Step 2: In a large bowl, cream together the softened butter and granulated sugar until light and fluffy. This usually takes about 3-5 minutes with an electric mixer. The mixture should look pale yellow and airy.
- Step 3: Beat in the eggs one at a time, then stir in the vanilla extract. The aroma of vanilla is always so inviting!
- Step 4: In a separate bowl, whisk together the flour, baking powder, and salt. Gradually add this dry mixture to the wet ingredients, mixing on low speed until just combined. Be careful not to overmix, as this can make your cookies tough.
- Step 5: Shape the dough into pointed witch hats. I like to roll about 1 tablespoon of dough into a ball, then gently taper one end to create a cone shape for the hat’s crown, and flatten the other end slightly for the brim. You’ll end up with wonderfully homemade Witch Hat Cookies.
- Step 6: Place the shaped cookies about 2 inches apart on the prepared baking sheets.
- Step 7: Bake for 10-12 minutes, or until the edges are lightly golden brown. They should still be slightly soft in the center. The smell filling your kitchen will be heavenly!
- Step 8: Let the cookies cool on the baking sheets for 5 minutes before transferring them to a wire rack to cool completely. This is crucial – warm cookies will melt the chocolate.
- Step 9: Once completely cool, melt your chocolate chips or wafers in a microwave-safe bowl in 30-second intervals, stirring between each, until smooth. Alternatively, use a double boiler.
- Step 10: Dip the top half of each cookie into the melted chocolate, letting any excess drip off.
- Step 11: Immediately decorate the chocolate-dipped portion with sprinkles and candies while the chocolate is still wet. Get creative with your designs for these delightful homemade Witch Hat Cookies!
- Step 12: Place the decorated cookies back on the wire rack or parchment paper and let them set completely at room temperature, or in the refrigerator for about 10-15 minutes if you’re in a hurry.

Pro Tips for the Best Irresistible Witch Hat Cookies
Achieving perfection with these cookies is easier than you think! Follow these tips for truly magical results:
- For perfectly pointed witch hats, chill your dough for about 15-20 minutes before shaping. This makes it less sticky and easier to work with.
- When dipping in chocolate, use a skewer or fork to hold the cookie, then gently tap off the excess before decorating.
- Don’t be afraid to experiment with different colored chocolates and unique candy combinations for truly creative designs.
- Ensure your cookies are COMPLETELY cool before dipping. I learned this the hard way – a slightly warm cookie will cause the chocolate to melt and slide right off!
What’s the secret to perfect Irresistible Witch Hat Cookies?
The secret lies in the dough consistency and proper cooling. A well-chilled dough makes shaping easier, and ensuring cookies are fully cooled before dipping prevents a messy chocolate disaster, making this a simple witch hat cookie tutorial to master. For more baking tips, you can check out expert advice.
Can I make Bewitching Witch Hat Cookies ahead of time?
Yes! You can bake the sugar cookies a day or two in advance and store them in an airtight container at room temperature. Decorate them closer to your event for the freshest look and taste. For more information on food storage, consult guidelines.
How do I avoid common mistakes with Enchanting Witch Hat Cookies?
Avoid overmixing the dough, as this leads to tough cookies. Also, be patient and wait for the cookies to cool completely before dipping in chocolate to prevent them from breaking or melting the coating.
Best Ways to Serve Witch Hat Cookies for Parties
These Irresistible Witch Hat Cookies are showstoppers on their own, but they also pair wonderfully with other treats for a complete Halloween spread. For a truly delightful dessert table, consider arranging them alongside some chocolate cupcakes or caramel apples. They also make fantastic individual favors! Place a few cookies in small cellophane bags tied with orange or purple ribbon. For more delicious Witch Hat Cookie ideas, try serving them with a warm mug of spiced apple cider or hot cocoa – the flavors complement the sweet cookie perfectly. They’re always a hit for parties, both for kids and adults alike! You can find more recipes here.
Nutrition Facts for Irresistible Witch Hat Cookies
These delightful cookies are a fun Halloween treat, and here’s a look at their nutritional breakdown per cookie. Knowing the details helps you enjoy them mindfully as part of your festive spread.
- Calories: 150
- Fat: 8g
- Saturated Fat: 4g
- Protein: 2g
- Carbohydrates: 18g
- Fiber: 1g
- Sugar: 15g
- Sodium: 50mg
Nutritional values are estimates and may vary based on the specific ingredients and decorations used for your Irresistible Witch Hat Cookies. For more information on nutritional data, you can refer to resources like the USDA FoodData Central.
How to Store and Reheat Spooky Witch Hat Cookies
Once your Halloween Witch Hat Cookies are baked and decorated, proper storage is key to keeping them fresh and delicious. Make sure the cookies are completely cool before storing them. For short-term storage, like 3-4 days, place the cookies in an airtight container. I like to layer them between sheets of parchment paper to prevent the decorations from smudging. If you need to keep these Irresistible Witch Hat Cookies longer, they freeze beautifully! Wrap each cookie individually in plastic wrap, then place them in a freezer-safe bag or container for up to 3 months. To reheat, simply let them thaw at room temperature for about an hour. If you want to refresh them a bit, a few seconds in a warm oven (around 200°F or 95°C) can bring back a slight crispness, but be careful not to melt the chocolate! You can learn more about proper food handling from the terms of use.

Frequently Asked Questions About Magical Witch Hat Cookies
What are Witch Hat Cookies?
Witch Hat Cookies are festive, shaped cookies designed to resemble the iconic pointed hats worn by witches, especially popular during Halloween. They typically consist of a sugar cookie base, often formed into a cone shape for the hat’s crown and a flat base for the brim, then dipped in chocolate and decorated with colorful sprinkles and candies.
Can I use a different cookie dough for these cookies?
Absolutely! While sugar cookie dough is a classic choice for its flavor and ability to hold shape, you can experiment with other firm cookie doughs. A gingerbread cookie dough would also work wonderfully, adding a bit of spice to your Magical Witch Hat Cookies. Just ensure the dough isn’t too soft or it might not hold its pointed shape.
How do I get the perfect pointed shape for my Irresistible Witch Hat Cookies?
The key is to work with slightly chilled dough. Roll about a tablespoon of dough into a ball, then gently taper one end to create the cone shape for the hat’s crown. For the brim, flatten the other end slightly. If the dough becomes too soft while working, pop it back into the fridge for a few minutes. This simple technique helps create those charming, recognizable shapes.
Are these cookies good for Halloween parties for kids?
Yes, they are a huge hit with kids! The fun shape, bright decorations, and sweet taste make them incredibly appealing. Plus, letting kids help with the decorating is a fantastic activity that adds to the Halloween fun. They’re one of the most engaging and delicious Halloween Witch Hat Cookies for any celebration.
Variations of Irresistible Witch Hat Cookies You Can Try
While the classic sugar cookie version is fantastic, there are so many fun ways to customize these cookies and create truly unique treats. You can easily adapt this recipe to suit different tastes and occasions. Here are a few ideas to inspire your creativity and help you achieve some really creative Witch Hat Cookie designs.
- Dietary Variations: For gluten-free friends, simply swap out the all-purpose flour for a good quality gluten-free baking blend. You can also explore vegan butter and egg substitutes to make them entirely plant-based.
- Flavor Boosts: Add a teaspoon of almond extract or a pinch of cinnamon to your sugar cookie dough for a different flavor profile. You could even use a chocolate cookie dough as the base for a richer treat.
- Alternative Dipping: Instead of chocolate, try dipping your cookies in colored candy melts or even a simple glaze made from powdered sugar and milk. This offers a different texture and sweetness.
- No-Bake Option: For a super quick version, use pre-made mini cupcakes or large marshmallows as the base for the witch hat’s crown, and attach them to a round cookie base. Dip and decorate as usual for a delightful no-bake Halloween treat.

Irresistible Witch Hat Cookies: 12 Magical Bites
- Total Time: 45 minutes
- Yield: 24 cookies
- Diet: Vegetarian
Description
Easy recipe for Irresistible Witch Hat Cookies, perfect for Halloween parties. These cookies are shaped like witch hats, dipped in chocolate, and decorated with colorful sprinkles and candy.
Ingredients
- Sugar Cookie Dough
- Chocolate (for dipping)
- Sprinkles
- Candy (for decoration)
Instructions
- Prepare your sugar cookie dough.
- Shape the dough into pointed witch hats.
- Bake the witch hat cookies according to the sugar cookie recipe.
- Allow the cookies to cool completely.
- Melt the chocolate for dipping.
- Dip each witch hat cookie into the melted chocolate.
- Decorate the chocolate-dipped cookies with sprinkles and candy.
- Let the decorations set before serving.
Notes
- Ensure cookies are fully cooled before dipping.
- Use different colored sprinkles for a festive look.
- Get creative with candy decorations to personalize your Irresistible Witch Hat Cookies.
- Prep Time: 30 minutes
- Cook Time: 10-12 minutes
- Category: Dessert
- Method: Baking and Dipping
- Cuisine: American
Nutrition
- Serving Size: 1 cookie
- Calories: 150
- Sugar: 15g
- Sodium: 50mg
- Fat: 8g
- Saturated Fat: 4g
- Unsaturated Fat: 4g
- Trans Fat: 0g
- Carbohydrates: 18g
- Fiber: 1g
- Protein: 2g
- Cholesterol: 20mg
Keywords: Irresistible Witch Hat Cookies, Bewitching Witch Hat Cookies, Magical Witch Hat Cookies, Enchanting Witch Hat Cookies, Spooky Witch Hat Cookies, Halloween Witch Hat Cookies, Easy Witch Hat Cookies recipe, Best Witch Hat Cookies recipe, How to make Witch Hat Cookies, What are Witch Hat Cookies, Why are Witch Hat Cookies popular, Witch Hat Cookie recipe Halloween, Homemade Witch Hat Cookies, Delicious Witch Hat Cookie ideas, How to decorate Witch Hat Cookies, Witch Hat Cookies for parties, Witch Hat Cookies for kids, Creative Witch Hat Cookie designs, Best ingredients for Witch Hat Cookies, Simple Witch Hat Cookie tutorial
